After official introduction of Gutenberg in version 5.0 of WordPress in 2018, the Gutenberg editor has been evolving daily. It was just a “fancier” way to create and publish content four years ago, but today we can do much more things with it. WordPress now provides a tool for modular content, full site editing experience, and more. Thanks to its modular nature, Gutenberg enables developers to be highly flexible when it comes to personalized solutions.
Now, what is Advanced Custom Fields Pro?
In one sentence – it allows adding custom content fields to pages, posts, menus, and, as we will see, to Gutenberg blocks.
Today, I will demonstrate here how to create fully customizable Gutenberg blocks with Advanced Custom Fields Pro (ACF). The steps includes
- Register a block with ACF
- Create the ACF fields
- Use the block on frontend
Let’s dive into the details.
Step 1: Register a block with ACF
ACF Pro provides acf/init action hook to register your blocks under.
To register a block with ACF, you need to use the below code block in your child theme’s functions.php file or any suitable location in your theme.
This will register a Testimonial block with ACF.
<?php


add_action( 'acf/init', 'site_acf_blocks' );

/**
 * Register the ACF Blocks
 *
 * @since 2.0
 */
function site_acf_blocks() {
    if (!function_exists('acf_register_block_type')) {
        return;
    }

    acf_register_block_type(array(
        'name'              => 'site_testimonials',
        'title'             => __('Testimonials'),
        'description'       => __('Testimonials Block'),
        'render_template'   => 'template-parts/blocks/testimonials.php',
        'category'          => 'site-theme',
        'icon'              => 'quote',
        'keywords'          => array( 'testimonial', 'home' ),
        'enqueue_assets' => function() {
            // only enqueue the block assets for the admin gutenberg editor
            if ( is_admin() ) {
                wp_enqueue_style( 'testimonials', get_template_directory_uri() . '/dest/css/blocks/testimonials.min.css' );
            }
        },
        'example'  => array(
            'attributes' => array(
                'mode' => 'preview'
            )
        ),
    ));
}
Step 2: Create a template for the ACF block
After registering the ACF block, we need to create a template for it which is mentioned under the render_template argument in the above code block.
Create the testimonials.php file in the desired location as specified with the below code.
<?php
/**
 * Template for the Testimonial Block
 */

// Create id attribute allowing for custom "anchor" value.
$id = 'site-testimonial-block-' . $block['id'];
if( !empty($block['anchor']) ) {
    $id = $block['anchor'];
}

// Create class attribute allowing for custom "className" and "align" values.
$className = 'site-testimonial-block-wrapper';
if( !empty($block['className']) ) {
    $className .= ' ' . $block['className'];
}
if( !empty($block['align']) ) {
    $className .= ' align' . $block['align'];
}

$header = get_field('header') ?: esc_html__('Testimonial', 'site-textdomain');
$testimonials = get_field('testimonials') ?: '';
?>
<div id="<?php echo esc_attr($id); ?>" class="<?php echo esc_attr($className); ?>">
    <h2><?php echo esc_html($header); ?></h2>
    <div class="site-testimonials">

    <?php
    // let's loop over the testimonials
    foreach( $testimonials as $testimonial ) :
        echo '<div class="site-testimonial">';
            echo '<p>' esc_html($testimonial['content']) '</p>';
            echo '<span> by - ' esc_html($testimonial['author']) '</span>';
        echo '</div>';
    endforeach;
    ?>
    </div>
</div>
In the above code, we create a simple template to render on the frontend with the data entered from the Gutenberg editor. Now, we need to create the ACF field group and add necessary fields as per the requirement.
Step 3: Create the ACF field group
From your WordPress dashboard go to Custom Fields > Field Groups and click on the “Add New” button. Give it a name and set the location rules to Block.
And you will see all your blocks registered with ACF on the right side dropdown, select “Testimonial” for now.

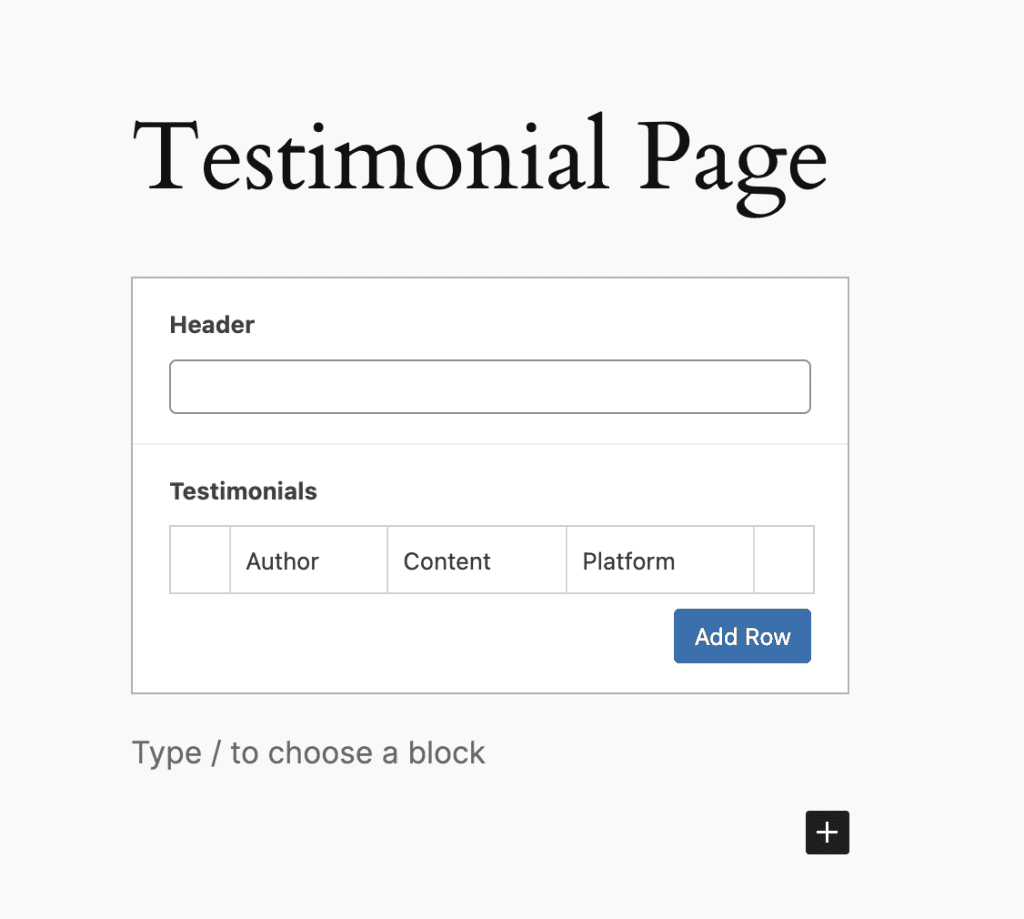
Step 4: Use the block on frontend
Now, we can to go create a page or post on the site. And search for the “Testimonial” block in the gutenberg editor. This block will have the fields were added to your ACF field group.
And that’s done! We have covered all 4 steps of creating a new Gutenberg template with ease and help of ACF Pro.
Leave a Reply